
The Detail Cleaning Step Most DIY Furniture Flips Miss
You’ve stripped the old finish, sanded everything smooth, and applied a primer coat. Somehow the paint still looks patchy, the hardware still has crud in the crevices, and the carved details look like they’re drowning in dried paint. Sound familiar?
The problem almost never comes down to technique. It’s the prep work — specifically, the step most DIY guides skip entirely: cleaning tight, detailed areas before refinishing. Hinges, carved grooves, dovetail joints, drawer runner channels — these spots trap grease, old wax, and sanding dust. If they’re not cleaned properly, your new finish will fail in exactly those spots.
Why Furniture Makeovers Fail Before the Paint Even Goes On
Most people treat furniture prep as: sand, wipe down, paint. That three-step shortcut works fine on flat surfaces. Furniture isn’t flat.
It’s carved details, tight joints, metal hardware, and years of built-up wax, grease, and grime in every crevice. When you sand a piece of furniture, the sanding dust doesn’t just float away — it settles into grooves, hinges, and corners. If you don’t remove it before priming, it acts as a barrier between the wood and the primer. That means adhesion failure, bubbling, and a finish that chips within weeks.
There’s also the wax problem. Most vintage and antique furniture has been waxed multiple times over the years. Wax doesn’t sand off — it spreads. If you’ve ever noticed paint that refuses to stick to certain spots on an old dresser or cabinet, wax contamination is usually the culprit. TSP (trisodium phosphate) cleaner dissolves wax and grease effectively from flat surfaces, but you still need something to scrub those tight spots afterward. A standard cotton ball or paper towel won’t cut it here.
The Three Surface Types That Need Individual Attention
Not all furniture surfaces are equal during prep:
- Carved decorative details — grooves collect old paint, wax, and dust. A brush doesn’t reach the bottom of these channels, and a cloth just smears the grime around.
- Metal hardware left in place — hinges and pulls have screw holes, pivot points, and gaps that fill with grease and paint over time. Cleaning around them isn’t the same as cleaning them.
- Joints and dovetail corners — where two wood surfaces meet, old finish pools and hardens. Sand past the corner and you’ve rounded an edge that should be crisp.
What Happens When You Skip Detail Cleaning
The finish looks fine for about three weeks. Then the paint around the carved details starts to flake because it never adhered properly to the dust-filled groove. The hardware has a gummy texture because old grease mixed with your new topcoat. You end up stripping the whole piece and starting over — which takes three times as long as doing the cleaning right the first time.
This is fixable. But it requires the right tools for the right spots.
The 4 Places Grime Hides on Furniture Before a Refinish
Before you pick up a brush, do a systematic sweep of these four problem zones. Every piece of furniture has them. Every one will sabotage your finish if you skip it.
- 1. Carved grooves and routed details. Run your fingernail along any decorative channel. If it comes out gray or waxy, the groove hasn’t been cleaned in years. Old paint sits in these channels and prevents new paint from reaching the wood surface. You need something narrow and firm — not a cloth, not a standard cotton swab — to scrub the bottom of the groove.
- 2. Hinge barrels and screw holes. The barrel of a hinge has a tiny gap that collects grease, paint drips, and rust. Screw holes often have stripped threads packed with old filler or paint. Neither a brush nor a rag can reach inside these spots effectively.
- 3. Drawer runner channels. These get coated in a combination of old wax — applied to make drawers slide smoothly — and compacted dust. If you’re painting the inside of a piece, that wax contamination will prevent adhesion entirely. If you’re leaving the runners natural, the old wax still needs to come off before you apply fresh paste wax.
- 4. Back panel staples and joint gaps. On older furniture, the back panel is often attached with staples or small nails. Around each fastener, there’s a gap where the panel meets the frame — dust packs in here and can trap moisture if you apply a water-based finish without cleaning first.
None of these spots are reachable with standard cleaning cloths or round-tip cotton swabs. This is exactly where precision cleaning tools earn their place in a DIY kit.
Regular Q-Tips vs Precision Swabs: What Actually Works in Tight Spots
The honest comparison: standard drugstore Q-tips work on wide, shallow surfaces. They fail on anything narrow, deep, or firm enough to require actual scrubbing. Here’s the breakdown:
| Feature | Standard Q-Tips | 6-Inch Pointed Cleaning Swabs |
|---|---|---|
| Length | 3 inches | 6 inches |
| Tip shape | Rounded | Pointed |
| Cotton firmness | Soft, compresses immediately | Firm, holds shape under pressure |
| Fiber shedding | Yes — fibers snag on rough wood and metal | No — cotton stays intact during scrubbing |
| Reach into deep grooves | Poor | Excellent |
| Handle durability | Cardboard — bends under light pressure | Natural wood — stays stiff for consistent pressure |
| Cost per unit | ~$0.01–0.02 | ~$0.015 (1,000-count pack at $14.99) |
| Best for | Wide surface wipe-downs, cosmetic use | Hardware, grooves, joints, tool cleaning |
What Users Found After Switching
One buyer noted: “Normal cotton swabs kept getting stray fibers caught on the pins and barely removed anything, these got my boards crystal clear.” That fiber-shedding problem shows up constantly in furniture work — a stray fiber embedded in a groove before painting is nearly impossible to remove without re-sanding the whole area.
The verdict: keep both types on hand. Standard Q-tips are fine for flat surface wipe-downs with mineral spirits. Use pointed precision swabs for anything that requires reach, firmness, or scrubbing inside carved details. Trying to use one for the other wastes time and produces worse results.
How to Clean Carved Details, Hinges, and Joints Step by Step
Here’s the actual process — not the vague “clean thoroughly” advice that appears in most refinishing guides.
Step 1: Degrease the Whole Piece with Krud Kutter
Krud Kutter Original ($8.97 at Home Depot, 32oz) or a TSP substitute mixed at 1/4 cup per gallon of warm water. Wipe down the entire piece with a lint-free cloth. Let it dry 20 minutes. This step dissolves wax and grease from flat surfaces. It does not reach inside grooves and hinges on its own — you need physical scrubbing for those spots.
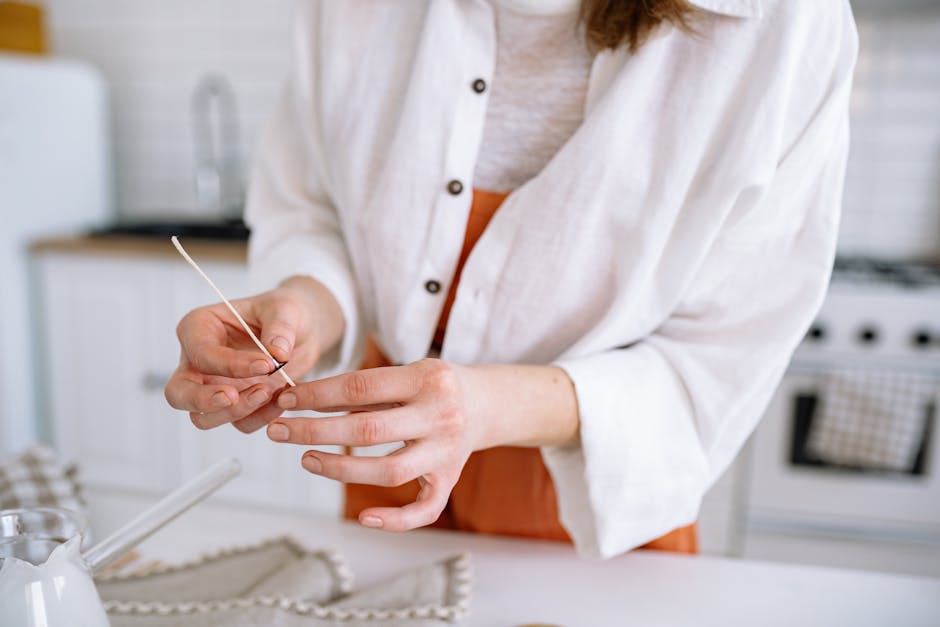
Step 2: Work Every Groove with Pointed Swabs and Denatured Alcohol
Use Klean-Strip Denatured Alcohol ($11.47 at Lowe’s, 1 quart) — not water, which raises wood grain and causes swelling in tight joints. Dip a pointed cleaning swab in the alcohol and work the tip along each carved groove with light circular pressure. The pointed tip reaches the bottom of the channel; the firm cotton scrubs without leaving fibers behind. Use a fresh swab every few inches. You’ll see immediately how much grime was sitting in there.
For very stubborn packed grime at hinge pivot points, curved dental floss picks with a thin 0.18mm thread ($9.99 for 210 individually wrapped) can break up compacted residue in gaps too tight for a swab tip. Follow up immediately with the cleaning swab to wick the loosened grime away.
Step 3: Vacuum, Then Tack Cloth — In That Order
After scrubbing every detail, vacuum the whole piece with a brush attachment to pull loose debris out of grooves. Then do a final wipe with a 3M tack cloth ($7.98 for a 6-pack). The tack cloth picks up anything the vacuum left behind, including fine sanding dust that settles back onto surfaces. Only after this step is the piece actually ready for primer.
Why 6-Inch Pointed Swabs Belong in Every DIY Furniture Kit
Here’s the direct position: the 1,000-count pointed cotton swabs at $14.99 are one of the highest-value tools in a furniture makeover kit — not because of clever marketing, but because nothing else does what they do at this price point.
The 6-inch length is the critical feature. Standard swabs can’t reach into a drawer channel or through a hinge barrel. A verified reviewer wrote: “The head is firm and does not unravel when cleaning and the extra length lets me get into hard to reach locations.” For furniture work, that extra reach is the difference between cleaning a joint properly and just cleaning around it.
The pointed tip matters just as much. Rounded tips push debris further into a groove rather than lifting it out. A pointed tip acts more like a pick — it gets under grime and breaks it loose before the cotton wicks it away. Multiple users confirmed: “High quality, very firm cotton, and great for getting into tight spaces.” That firmness is what lets you scrub rather than just dab.
Real Limitations to Know Before You Buy
These aren’t flawless. Some users report the wooden handle snapping under heavy pressure — which means they’re not built for high-force scrubbing against hard surfaces. If a spot requires serious force, pre-loosen it with a toothpick first, then follow with the swab. The tip also isn’t fine enough to replace a true dental pick or engraving tool for very narrow inlay work. For the majority of furniture hardware and carved detail cleaning, though, they handle it completely.
How They Compare to Other Precision Cleaning Tools
Homax detail brushes ($6 at Lowe’s) work for larger carved areas but shed bristles into wet finishes — a serious problem if you’re cleaning right before priming. Techspray Clean-Tip foam swabs (~$0.20 each) are lint-free but too soft to scrub effectively. IPA pre-saturated wipes work fast for electronics and delicate inlay. The cotton pointed swabs sit in a useful middle ground: cheap enough to use 30 on one project, firm enough to actually scrub the grime loose rather than just smearing it.
The Verdict
If your furniture work involves any carved details, metal hardware, or tight joints — get the pointed swabs. At $14.99 for 1,000, you’ll pull from that pack across every project for the next two years. Standard Q-tips do not replace them for this kind of work. That’s the whole answer.
What a Complete DIY Furniture Prep Kit Actually Costs
The reputation furniture flipping has for being expensive usually comes from buying the wrong tools twice. Here’s what a complete prep kit costs when you build it right the first time:
| Tool | Recommended Product | Price | Where to Buy |
|---|---|---|---|
| Degreaser | Krud Kutter Original (32oz) | $8.97 | Home Depot |
| Denatured alcohol | Klean-Strip Denatured Alcohol (1 qt) | $11.47 | Lowe’s |
| Precision cleaning swabs | 6-inch pointed swabs, 1,000 ct | $14.99 | Amazon |
| Tack cloth | 3M Tack Cloth (6-pack) | $7.98 | Home Depot |
| Detail brush | Purdy Clearcut 1-inch angle brush | $12.98 | Lowe’s |
| Lint-free cloths | Scott Shop Towels (55-count) | $6.97 | Hardware stores |
| Total kit cost | $63.36 |
Most of these products last 10 to 15 projects. Once the kit is built, per-project prep costs drop well under $10.
Where to Save Without Cutting Corners
The denatured alcohol and degreaser are non-negotiable — do not substitute these with cheaper alternatives. Skipping TSP or Krud Kutter and just wiping with water is the single most common reason adhesion fails on refinished pieces. Where you can save: the 1,000-count swab pack already drives the per-unit cost to fractions of a cent, and store-brand tack cloths perform identically to 3M for about half the price.
Paint and Topcoat Are Separate Budget Items
This is the prep kit only — no paint or topcoat included. For paint, Annie Sloan chalk paint runs $45 per quart and requires no primer on most surfaces. Fusion Mineral Paint at $34.95 per pint self-levels better on flat panels and cabinets. For topcoats, Rust-Oleum Varathane ($12.97) handles tabletops and high-wear surfaces reliably. General Finishes High Performance water-based topcoat ($29.99 per quart) is the pick for pieces that need a harder, more durable finish — dressers, cabinets, anything that sees regular handling.
The patchy finish and paint flaking around carved details that started this whole problem? Almost always traceable to the 20-minute detail cleaning step that should happen before the primer goes on. Get that step right, and most of the downstream failures sort themselves out.
Disclaimer: The information on this page is for educational purposes only and does not constitute financial advice. Rates, terms, and eligibility requirements are subject to change. Always compare multiple lenders and consult a licensed financial advisor before borrowing.
