
Budget Podcast Setup: 7 Things to Know Before You Spend $150+
How little can you spend and still not sound like you recorded in a bathroom?
That’s the actual question. Not “what’s the best microphone” — that answer costs $400. The useful question is where the floor is. What’s the minimum outlay for audio that doesn’t undercut your credibility every time you hit record?
The honest answer is somewhere between $130 and $150 — but only if you buy the right thing for your specific situation. Buy the wrong setup and you’ll spend $146 and still wonder why your audio sounds hollow and echoey. This breakdown covers seven decisions: two specific gear picks and five things that separate podcasters who sound good from those who keep blaming their equipment.
This is not financial advice. Product assessments are based on published specifications, verified buyer feedback, and market pricing as of 2026.
What a Real Podcast Setup Actually Costs
The influencer desk setup with the Neumann U87 and the API preamp is aspirational content, not a buying guide. Here’s what a functional solo podcast setup actually costs at entry and mid-range tiers:
| Component | Budget Tier | Mid Tier | What the money buys |
|---|---|---|---|
| Microphone | $50–80 | $100–150 | Capsule quality, frequency response, off-axis rejection |
| Audio interface | $50–80 | $100–180 | Preamp quality, 48V phantom power, low-latency monitoring |
| Mic arm or stand | $15–25 | $30–60 | Desk stability, positioning flexibility, vibration isolation |
| Acoustic treatment | $20–40 | $60–120 | Reduced echo and room reverb at the source |
| Recording software | $0 (Audacity, GarageBand) | $0–21/month | Editing, noise reduction, compression, EQ, export |
| Realistic total | $135–225 | $290–530 |
The gap between tiers is real. But diminishing returns kick in fast. Most podcast listeners — on earbuds during a commute, half-paying attention — cannot tell the difference between a $100 mic and a $250 mic in a treated room. They absolutely hear the difference between any mic in a bare room versus one with $30 of foam panels on the wall behind the speaker.
Tip 1: Spend $20 on Room Treatment Before Anything Else
This is the most consistently ignored advice in beginner audio guides, because acoustic foam is boring to buy. But here’s the problem: echo and reverb are baked into your recording at the source. Software noise reduction — even Audacity’s capable built-in tool — can reduce room noise, but it can’t remove reverb cleanly without introducing processing artifacts. You can hear the digital smearing. Fix the source instead.
Acoustic treatment is not soundproofing. Soundproofing costs thousands. A $25–40 pack of foam panels on the wall behind your screen reduces the echo that makes you sound like you’re in a stairwell. A closet full of clothes works surprisingly well. A room with carpet, curtains, and a bookshelf beats a bare-walled office every single time. Use what you already have before spending on anything else.
When All-in-One Bundles Actually Save You Money
Buying a microphone and audio interface separately at comparable quality costs $150–250 minimum, plus compatibility research. Bundles ship both components pre-configured and tested together, typically for $100–180, and eliminate the guesswork. The math is solid for entry-level solo setups. It stops working when you need features the bundle doesn’t offer — like two XLR inputs for interview shows, or studio-grade preamps for music recording. Know your use case before you commit.
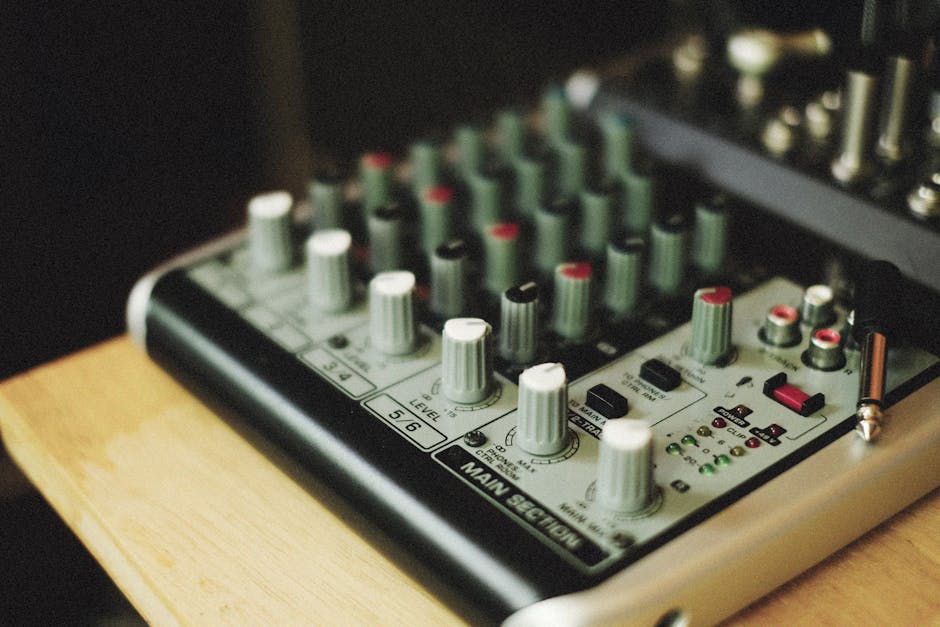
The MAONO AME2A Bundle at $146.49 — What You’re Actually Buying
The MAONO MaonoCaster AME2A bundle pairs an XLR condenser microphone with the MaonoCaster audio interface — a compact mixer with 48V phantom power, Bluetooth audio streaming, multiple sound effect pads, reverb and pitch controls, and a guitar input. At $146.49, that feature list is hard to match at this price range. It holds a 4.3/5 rating from 396 verified buyers, which is a statistically meaningful sample at this price tier.
Specs That Matter
- Mic type: XLR condenser (phantom power provided by the included interface — no separate power supply needed)
- Phantom power: 48V (standard professional voltage for condenser mics)
- Connectivity: USB to PC or Mac; Bluetooth for background music streaming
- Audio ducking: Automatically lowers background music when your voice is detected
- Sound pads: Multiple pads for stored audio clips — intros, drops, sound effects
- Guitar input: Yes, supports basic instrument recording
- XLR inputs: One (this number matters — more on that below)
- Compatible platforms: PC, Mac, YouTube, Twitch, most streaming software
The Bluetooth plus audio ducking combination is the feature that separates this from generic interfaces at similar prices. For live streamers who want background music without manually riding the volume fader, it’s a genuinely useful workflow. One verified buyer described it as “so nice for live broadcasting” — and that sentiment appears across multiple independent reviews. Another noted it “works just as well for professionals as it does for content creators,” which tracks with what the specs suggest.
Setup experience also gets consistent praise. One buyer noted: “The connectivity is seamless — it was incredibly easy to set up and get running immediately.” For users who aren’t audio engineers, plug-in-and-record reliability is not a small thing.
The Real Limitations — Before You Buy
Two complaints show up repeatedly in buyer feedback. Neither is minor.
First: one XLR input. This is a hard ceiling for any interview-format recording. As one verified reviewer wrote: “the lack of a second XLR 48v powered mic input would make it difficult to manage interview style podcasts of any quality.” There is no workaround. If you need two condenser mics running simultaneously, this interface cannot do it.
Second: the physical control layout. The unit is compact — which buyers generally appreciate for desk space — but as one reviewer noted, “small size means fine control using sliders and dials is tricky.” If you’re adjusting gain or effects live during a session, the tight spacing becomes an operational frustration rather than a minor inconvenience.
A small number of buyers reported units powering off within minutes of use, requiring returns. This appears to be manufacturing defect variation, not a product-wide flaw — MAONO’s after-sales team reportedly dispatches same-day replacements, which multiple reviewers mentioned by name. Reassuring, but worth factoring in if you need the setup to work on a specific deadline.
One platform-specific note: at least one buyer reported voice audio being completely inaudible to the audience during TikTok Live streams. TikTok’s audio routing can behave differently than YouTube or Twitch. If TikTok Live is your primary platform, test thoroughly before going live to a real audience.
Bottom Line on the AME2A
For a solo creator — podcast, YouTube channel, Twitch stream, voice-over work — the AME2A delivers genuine value at $146. The Bluetooth streaming, phantom power, and built-in sound effects are features you’d spend $200+ to assemble from separate components. If you need two mic inputs or plan to expand to interview format quickly, it’s the wrong tool. For one-person shows, it’s the right one.
Three Financial Mistakes That Cost New Podcasters More Than the Gear Does

No product recommendations in this section. Just the three decisions where budget podcasters consistently misallocate money and regret it.
Mistake 1: Buying a Condenser Mic for the Wrong Room
Condenser microphones are sensitive — that’s the point. Studios use them to capture detail and nuance. They also capture everything else: keyboard clicks, HVAC hum, ambient street noise, the faint echo from bare walls. In a controlled environment, that sensitivity is a professional asset. In an untreated home office, it’s a liability that no software fix fully resolves.
Dynamic microphones — like the Shure SM7B at $399 or the Rode PodMic at $99 — reject off-axis sound by design. They work in noisier, less controlled environments. Podcasters specifically gravitate toward them because they’re forgiving of real-world recording conditions. If your space is untreated, shared, or variable, a dynamic mic is the financially sound choice, even if its spec sheet looks less impressive than a condenser.
Buying a condenser mic for a bad room, recording poor audio, then buying acoustic treatment to fix it costs more than choosing the right mic type for your environment from the start.
Mistake 2: Overbuilding Before You Know You’ll Stick With It
Most podcasts don’t survive 10 episodes. That’s not a judgment — it’s the statistical reality of the medium. The financially smart move is capping your downside if you stop.
A $150 setup resells used for roughly $70–90. A $500 setup resells for maybe $250. The cheaper entry point limits how much you lose if you discover podcasting isn’t what you thought it was. Upgrade based on actual recorded experience — once you’ve identified the specific wall you’ve hit — not based on what YouTube setup tours make look appealing. Real data beats pre-purchase speculation every time.
Mistake 3: Paying for Recording Software at the Start
Audacity is free, cross-platform, and handles multi-track recording, noise reduction, EQ, compression, and MP3 export. GarageBand is free on Mac. Adobe Audition runs $20.99 per month. Hindenburg Journalist Pro is $99 per year. Neither paid option is worth the cost until you’ve hit a specific, concrete limitation that free tools genuinely can’t address.
Learning Audacity first forces you to understand what audio processing actually does. That knowledge tells you what paid tools are worth paying for and why. Skipping to paid software before mastering free ones optimizes the wrong variable. Keep the money for acoustic foam or a mic arm instead.
MAONO PD300XT ($129.99): When Simpler Is the Smarter Buy
The MAONO PD300XT dynamic microphone operates on a different premise entirely. USB and XLR dual-output means it plugs directly into your computer with no interface required, no phantom power needed, no additional hardware. Plug the USB cable in, open Audacity, and it works. The 192kHz/24-bit capture rate is high for this price range — more relevant to music recording than spoken-word podcasting, but it reflects capsule quality that punches above the $130 price point.
| MAONO AME2A Bundle ($146.49) | MAONO PD300XT ($129.99) | |
|---|---|---|
| Mic type | XLR condenser | USB/XLR dynamic |
| Interface required | Included (MaonoCaster) | No — USB direct to computer |
| Sample rate | Interface-dependent | 192kHz/24-bit built-in |
| Background noise rejection | Lower (condenser capsule) | Higher (dynamic capsule) |
| Bluetooth + sound pads | Yes | No |
| Best use case | Streaming, live shows, YouTube with effects | Clean recording in noisy or untreated rooms |
| Verified buyer rating | 4.3/5 (396 reviews) | 4.0/5 (78 reviews) |
The PD300XT has fewer reviews — 78 versus the AME2A’s 396 — which means the 4.0/5 rating carries less statistical weight. That number could shift. For what it is, though: a no-frills dynamic mic that works in rooms where background noise is a real problem, it does what it claims.
Bottom Line on the PD300XT
The right pick if your recording space is noisy or untreated, if you want absolutely zero setup complexity, or if you already own an interface and just need the microphone. At $16 less than the AME2A bundle, you give up the Bluetooth features, audio ducking, and mixing controls. For straight spoken-word recording where clean audio and simplicity are the priorities, that tradeoff is worth it. For live streaming with effects and background music, it isn’t.
When Neither of These Is the Right Buy
If your show is interview-format — two hosts, two mics, recorded simultaneously — skip both options and budget for the Focusrite Scarlett 2i2 at $199 paired with two Rode PodMic Dynamic mics at $99 each. Total outlay: around $397. Buying the AME2A at $146 and replacing it in three months because the single XLR input is a dealbreaker costs more than getting the right tool the first time. The Scarlett 2i2 is the standard entry point for dual-host setups, and the Rode PodMic is the workhorse mic for voice in untreated rooms. The math only favors a bundle when you’re going solo and staying solo.
Common Questions About Budget Podcast Gear
Do I need an audio interface if I buy a USB microphone?
No. USB microphones have a built-in analog-to-digital converter — they plug directly into your computer and recording software treats them as a standard audio input. An interface is only required for XLR microphones, which output a raw analog signal that your computer can’t read directly. The AME2A bundle includes the MaonoCaster interface because its microphone uses an XLR connection. The PD300XT’s USB output handles the conversion internally and bypasses the need for one entirely.
Is 48V phantom power something I should worry about?
Only if you’re using a condenser microphone. The 48V voltage powers the active electronics inside the condenser capsule — without it, the mic produces no usable signal at all. Dynamic mics don’t use phantom power. The MaonoCaster interface in the AME2A bundle supplies 48V, so you don’t need to source it separately. If you ever buy an XLR condenser microphone independently, confirm before purchasing that your interface actually supplies phantom power — many budget interfaces skip it to cut costs.
What’s the real difference between a $100 and a $300 podcast mic?
In a treated room: smaller than most people expect. In an untreated room: the $300 mic sometimes sounds worse because a better capsule picks up more room noise. The measurable differences at $300+ are better off-axis rejection, tighter capsule manufacturing tolerances, and cleaner preamp performance — factors that matter in professional contexts. For a listener in earbuds during a commute, the gap is audible but not decisive. Spend on acoustic treatment first. Then reassess whether upgrading the mic is actually the bottleneck.
Can the MAONO AME2A handle guitar recording?
Yes — the MaonoCaster includes a dedicated instrument input. For solo acoustic recording or vocals over a pre-recorded backing track, it’s functional. The single XLR limit still applies: you can’t record guitar and vocals on separate tracks simultaneously through this interface. For basic home demos or content that occasionally includes a guitar, it works fine. For multi-track music production, a multi-channel interface — Focusrite Scarlett 2i2 at minimum — is the right tool. The AME2A was built for podcasting and streaming first; guitar is a secondary use case, and the audio quality for that purpose is reasonable given the price.
The floor, as it turns out, is $130. Both options here clear it. The MAONO PD300XT gets you there with zero friction. The AME2A bundle at $146 gets you there with live streaming features built in. Match the pick to your actual room and your actual workflow, and you stop second-guessing your audio the same week it arrives.
Disclaimer: The information on this page is for educational purposes only and does not constitute financial advice. Rates, terms, and eligibility requirements are subject to change. Always compare multiple lenders and consult a licensed financial advisor before borrowing.

