Your basil died on the windowsill. Again. The three-pack from the grocery store lasted two weeks before it turned into a leggy, root-bound disaster, and now you are paying $3.99 per bunch at the store for something that should be growing six feet from your kitchen.
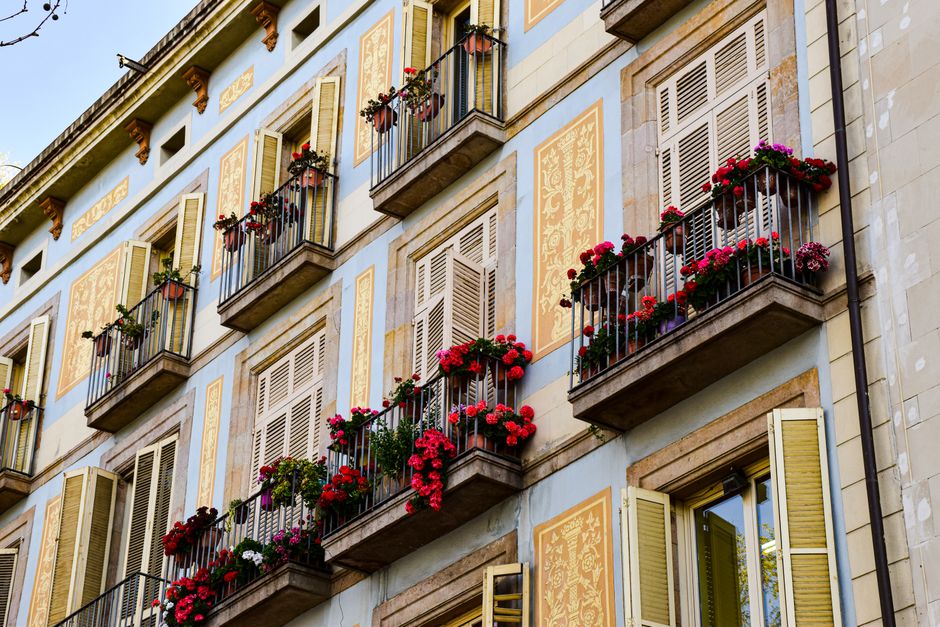
The balcony outside your apartment is not empty — it is just being used wrong. Most renters treat balcony space as floor space only, which means a 60-square-foot balcony offers maybe 12 usable square feet of planting area once a chair and table occupy the rest. Go vertical, and that same balcony can support 20 to 30 herb plants across three to four feet of wall or railing.
Here is what works, what fails faster than most people expect, and how to build a setup that survives a full growing season.
Why Most Balcony Herb Gardens Fail in the First Month
Vertical herb gardens fail for three predictable reasons, and none of them are lack of effort. They are structural problems that show up around week three, right when the plants look like they have finally settled in.
The Drainage Problem Nobody Warns You About
Standard terra cotta pots and fabric pocket planters drain downward. In a horizontal row of floor pots, that is fine — each pot drains independently. Stack those same planters vertically, and the water from the top tier runs directly into the tier below, then the next, then the next. The top plants dry out. The bottom plants sit in water.
Gardeners have generally found that pocket-style vertical planters — the kind sold as decorative felt wall gardens — are the worst offenders for herbs specifically. The Vivosun 5-Pocket Hanging Felt Planter ($12 at most garden retailers) works fine for strawberries and trailing plants. For herbs that need dry-to-moist rather than consistently wet roots, the bottom pockets typically stay too saturated between waterings. The fix is selecting structures where each tier has its own independent drainage channel rather than a shared base — more on this below.
Sun Exposure Math for Balconies
Most balconies are partially shaded by the floor of the balcony above. That overhang blocks direct overhead sun, which narrows your actual direct sunlight window to two to four hours per day rather than the six that basil and rosemary technically require.
Measure it before you build. Sit on your balcony at 10 a.m., noon, and 2 p.m. on a clear day and note how much of your wall space is in direct sun. Results vary significantly by compass orientation: south-facing balconies in the northern hemisphere typically receive the most total light, east-facing balconies get morning light only, and west-facing balconies get afternoon sun. North-facing balconies are, in most cases, too shaded for basil or rosemary — stick to mint, parsley, and chives if that is your situation.
Wind is the second exposure factor that catches people off guard. Balconies above the fourth floor experience significantly higher sustained wind speeds than ground-level gardens. Wind increases transpiration — plants lose moisture faster — and physically damages soft-stemmed herbs like basil. Taller, tiered tower planters on high-floor balconies frequently tip or stress plants mid-season. Lower-profile railing planters and wall-mounted systems perform more reliably where wind is a consistent factor.
Vertical Garden Structures Compared
There is no single best structure for every balcony. The right choice depends on your wall type, sun position, floor space, and whether your lease allows wall mounting. This table covers the most widely available options with real pricing as of 2026.
| Structure Type | Example Product | Cost | Capacity | Best For | Main Weakness |
|---|---|---|---|---|---|
| Pallet garden | Reclaimed HT-stamped pallet (DIY) | $0–$20 | 12–20 plants | Budget renters, ground-floor balconies | Heavy when wet; needs wall or fence support |
| Pocket planter | Vivosun 5-Pocket Hanging Felt Planter | $12–$18 | 5–10 plants | Small balconies, temporary setups | Drainage runs top-to-bottom; overwaters lower pockets |
| Tiered tower | Mr. Stacky 5-Tier Stackable Planter | $35–$50 | 20–25 plants | Floor-based, portable setups | Unstable in high winds above the 4th floor |
| Pegboard system | IKEA SKADIS 40x56cm ($15) | $15–$35 | 8–15 plants | Wall-mounted, apartment-friendly setups | Requires wall anchoring; not railing-compatible |
| Living wall planter | Woolly Pocket Wally 5 ($65) | $60–$80 | 5 plants | Permanent installs, aesthetic priority | High per-plant cost; needs consistent watering attention |
| Self-watering tower | Lechuza CARARO Color 40 | $90–$120 | 8–12 plants | Frequent travelers, low-maintenance setups | High upfront cost; heavy when reservoir is full |
The Mr. Stacky 5-Tier Stackable Planter is the most practical starting point for most balcony situations. Each tier drains independently into the tier below through a controlled center channel, which solves the waterlogged-bottom-tier problem that plagues cheap pocket planters. At around $40, it holds up to 25 small herb plants and disassembles for winter storage — a meaningful advantage if you live somewhere with hard winters.
Six Herbs That Actually Work in Vertical Planters
Not every herb is a good fit for shallow vertical growing. Deep-rooted plants like dill or fennel need 12 inches of soil depth — more than most pocket planters or tower tiers provide. The following herbs are well-matched to the 4 to 6 inches of soil depth typical in vertical setups, and gardeners have generally found them reliable across multiple growing seasons.
- Chives — Shallow roots, tolerates partial shade, grows back after cutting. The most forgiving herb in any structure type.
- Mint — Aggressive grower; keep it in its own pocket or tier to prevent it from overwhelming neighbors. For north-facing balconies, mint is typically your most reliable option.
- Thyme — Drought-tolerant, loves heat and sun. Performs especially well in the upper tiers of stackable planters where faster drying between waterings is a real risk.
- Parsley — Slower to establish than the others, but productive once settled in 4-inch-deep pockets. Start from transplant rather than seed in a vertical setup — seeds take too long to establish root mass.
- Basil — Needs 6+ hours of direct sun and does not tolerate cold below 50°F. Only attempt basil if your balcony is south or west-facing. Compact curly basil varieties work better in tight tower tiers than large-leaf Genovese types, which need more lateral room.
- Oregano — Grows laterally and spills attractively over planter edges. Drought-hardy; well-suited for the top tier of any tower planter where consistent moisture is hardest to maintain.
How to Build a Pallet Herb Garden Step by Step
A reclaimed wooden pallet is the lowest-cost path to a functional vertical herb garden. The approach works best on ground-floor balconies with a solid wall or fence to lean against, and you must source a heat-treated pallet rather than a chemically treated one. Look for the HT stamp burned into the wood — this indicates heat treatment during manufacturing. Avoid any pallet marked MB, which indicates methyl bromide treatment.
What You Need and What It Costs
- One HT-stamped wooden pallet — free from nurseries, hardware stores, or local marketplace listings
- Landscaping fabric or burlap — approximately $8 for a 4-foot roll
- Staple gun and staples — around $12 if you do not already own one
- Container potting mix rated for pots, not garden beds — standard garden soil compacts and blocks drainage ($8–$12 for a 16-quart bag)
- Herb transplants in 4-inch pots — $2–$4 each at most garden centers in spring
Total cost for a pallet setup with six herbs: typically $28 to $40, depending on how many transplants you buy.
Assembly in Four Steps
- Inspect and clean the pallet. Confirm the HT stamp. Sand rough edges smooth. Let it dry completely before lining.
- Line the back and bottom. Cut landscaping fabric to cover the solid back face and the bottom slat. Staple firmly every 3 inches. This holds soil in while still allowing water to drain through the bottom.
- Fill while horizontal. Lay the pallet flat on the ground. Fill each slat pocket with container potting mix to 1 inch below the slat edge. Pack lightly to close air pockets without compressing the mix.
- Plant, wait two weeks, then stand upright. Insert herb transplants into each pocket while the pallet is still lying flat. Let it rest horizontal for 10 to 14 days so roots establish before you move it vertical. When you stand it up, angle it slightly backward against the wall rather than fully vertical — this reduces soil spillage and improves stability.
The Single Biggest Watering Mistake in Vertical Gardens
Watering on a fixed schedule kills more vertical herb gardens than drought does. Feel the top inch of soil in each tier or pocket before watering — if it is still moist, skip that day. Vertical planters dry unevenly depending on sun exposure and wind, and a blanket rule of every two days typically overwaters shaded lower tiers while underwatering sun-exposed upper ones. Adjust by tier, not by calendar.
Which Setup Fits Your Balcony
The right structure comes down to three variables: floor space available, whether wall mounting is permitted in your lease, and how much upfront cost you can absorb. This summary maps the most common balcony scenarios to the structure that has generally performed best in each.
| Your Situation | Best Structure | Why It Works Here |
|---|---|---|
| Renting, no wall drilling allowed | Mr. Stacky 5-Tier Tower | Freestanding, no mounting required, portable at end of lease |
| Ground-floor balcony, budget under $30 | DIY pallet garden | Lowest cost per plant; works against any solid wall or fence |
| North-facing or low-light balcony | Mr. Stacky on railing or railing planter | Position at railing edge to capture maximum available light; grow mint, chives, parsley only |
| Balcony above 5th floor with wind exposure | IKEA SKADIS wall-mounted pegboard | Anchored to wall; low profile reduces wind load compared to tall freestanding towers |
| Frequent travel, low-maintenance priority | Lechuza CARARO Color 40 | Built-in reservoir holds up to two weeks of water; reduces failure risk during absence |
| Aesthetic priority, permanent installation | Woolly Pocket Wally 5 | Clean visual impact; functions as a living wall feature, not just a produce source |